 Here is a question I am asked a lot: do you trace your artwork onto your canvas or surface?
Let’s clear something up right away:
Tracing is not cheating.
It’s a technique. A tool. A method. A perfectly legitimate part of the creative process used by artists throughout history—from Renaissance masters to modern illustrators to anyone who has ever tried to draw a Great Dane without accidentally turning it into a horse.
To be clear, when I say “tracing”, I’m referring to applying at pattern or design to your surface, not necessarily literally using carbon paper to trace over a design. But, that might be your method, it’s just not limited to that.
Because I tend to work on large canvases, I regularly project the basic design on the canvas or wall. I don’t like to add a lot of detail at that stage, but every artist is unique in that way.
Because I tend to work on large canvases, I regularly project the basic design on the canvas or wall. I don’t like to add a lot of detail at that stage, but every artist is unique in that way.
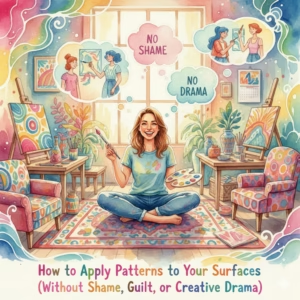
If you’ve ever wondered whether it’s “okay” to trace, or if you’ve struggled to transfer patterns onto canvas, wood, fabric, or other surfaces, this guide will walk you through the why, when, and how of pattern application with zero judgment and lots of practical tips.
Why Tracing Is a Valid Artistic Technique
Tracing helps you:
• establish accurate proportions
• speed up repetitive design work
• transfer complex patterns cleanly
• maintain consistency across multiple pieces
• reduce frustration during the early stages of a project
Professional artists use tracing for murals, product design, illustration, surface pattern design, and more. It’s not a shortcut—it’s part of the workflow.
The creativity isn’t in the transfer. The creativity is in the interpretation, the color, the texture, the choices you make afterward. It also saves me a lot of time and frustration.
When Tracing Makes Sense
You might choose to trace when:
• you’re working on a large‑scale piece
• you need to repeat a motif across multiple surfaces
• you’re transferring a digital design to a physical object
• you’re working with intricate line art
• you’re creating a pattern for fabric, furniture, or home décor
• you’re trying to save time (which is allowed, by the way)
Tracing is especially helpful for artists who create products—coloring pages, printables, stencils, or repeatable designs—because it ensures consistency. It’s also helpful for beginners because it’s easy to get proportions and perspective out of whack when your are getting started.
How to Apply Patterns to Your Surfaces
Here are the most reliable, artist‑tested methods for transferring patterns onto different surfaces. Choose the one that fits your medium and project.
1. The Graphite Transfer Method (Classic and Foolproof)
Best for: paper, canvas, wood, smooth surfaces.
How to do it:
How to do it:
1. Print your pattern.
2. Flip the paper over and rub graphite (a soft pencil) across the back.
3. Place the pattern right‑side up on your surface.
4. Trace the lines with a pen or stylus.
5. Lift the paper to reveal a clean, light outline.
Why it works:
Graphite transfers easily and erases cleanly, making it ideal for painting and drawing.
2. Transfer Paper (Carbon or Graphite Sheets)
Best for: wood, canvas, walls, fabric, ceramics.
How to do it:
1. Place transfer paper between your pattern and your surface.
2. Trace the design.
3. Remove both sheets to reveal the transferred lines.
Why it works:
It’s fast, clean, and great for large or detailed designs.
3. Lightbox or Window Tracing
Best for: thin paper, sketchbooks, watercolor paper. Now that LED lightboxes or lightpads have become so inexpensive, this is something it is easy to have in your home studio.
How to do it:
1. Tape your pattern to a lightbox or sunny window.
2. Tape your drawing paper on top.
3. Trace the design.
Why it works:
It’s simple and requires no extra materials—just light.
4. Projector Method (The Modern Favorite)
Best for: murals, large canvases, furniture, walls, signs.
How to do it:
1. Project your pattern onto the surface.
2. Adjust size and placement.
3. Trace directly onto the surface.
Why it works:
It’s perfect for scaling designs up or down and saves hours of measuring.
5. Stencil Method
Best for: repeat patterns, furniture, walls, fabric.
How to do it:
1. Cut your pattern into a stencil (or use a pre‑cut one).
2. Tape it to your surface.
3. Apply paint with a sponge, brush, or spray.
Why it works:
It creates crisp, repeatable designs with minimal effort.
6. Chalk Transfer (For Dark Surfaces)
Best for: chalkboards, dark wood, black canvas, fabric.
How to do it:
1. Rub chalk on the back of your pattern.
2. Place it chalk‑side down on your surface.
3. Trace the design.
4. Lift to reveal a white outline.
Why it works:
Graphite won’t show on dark surfaces—chalk will.
7. Heat Transfer (For Fabric)
Best for: T‑shirts, tote bags, fabric panels.
How to do it:
1. Print your pattern on heat‑transfer paper.
2. Iron it onto the fabric.
3. Paint or stitch over the transferred lines.
Why it works:
It’s durable and ideal for textile art.
How to Keep Your Artistic Voice While Tracing
It makes me crazy that this is such a source of guilt and cattiness among artists, especially when you are using your own design! But, even if you aren’t there shouldn’t be any shame! If it was good enough for Michelangelo, it should be good enough for you!
If you’re worried tracing will make your work feel “less original,” here’s how to keep your voice front and center:
• change proportions, shapes, or details
• add your own textures or linework
• use unexpected color palettes
• combine multiple references into one design
• stylize the pattern in your signature way
• treat the traced lines as a starting point, not a final blueprint
Your creativity doesn’t disappear because you used a tool. Tools amplify creativity—they don’t diminish it.
When Tracing Isn’t Ideal
There are times when tracing may not serve you:
• when you’re practicing foundational drawing or designing skills
• when you want to develop your own proportions or style
• when you’re exploring gesture, movement, or loose sketching
• when the goal is experimentation rather than precision
Tracing is a technique—not a replacement for skill building. Use it intentionally, not exclusively.
Final Thoughts
Do I trace my artwork? Sometimes—when it makes sense, when it saves time, when it supports the project, and when it helps me bring a vision to life more efficiently. As I mentioned before, it is especially important to me when I’m working on very large surfaces. I also like to do it when I’m working on portraits. I draw the design on paper, and then project it onto a canvas so that I get the proportions right, the shape of the eyes, the ears, etc. Without those things, a portrait won’t look like the subject. There are many artist who can do this without projection. Does that bother me? Not a whit! Every artists has strengths and weaknesses. I know my own.
Should you trace your artwork? If it helps you create, the answer is yes.
Creativity isn’t about doing everything the hard way. It’s about making choices that support your process, your joy, and your artistic voice. If anyone tells you otherwise, I would suggest that person isn’t supporting you in your art.